Sending unit float fail
Moderators: kamzcab86, CalAltaDubber
-
Hoppy
- Posts: 65
- Joined: Mon Apr 07, 2008 9:40 am
- What year is your cabby?: 1986
- Do you own a Cabriolet?: Yes
- Location: Kansas
Sending unit float fail
It appears the fix to the hole in the fuel sending unit float failed, anyone know of an alternative or have one for sale? would another float from a different car work?
John
1950 Beetle
1955 Beetle
1982 Westy
1986 Cabriolet (Best Seller)
1950 Beetle
1955 Beetle
1982 Westy
1986 Cabriolet (Best Seller)
-
Briano1234

- Whats that smell?
- Posts: 4105
- Joined: Mon Mar 21, 2005 5:45 am
- What year is your cabby?: 1992
- Do you own a Cabriolet?: No
- Location: Duluth, Ga
- Contact:
Re: Sending unit float fail
Most any one off of a 90 VW will work. How did you patch it?
Some epoxies are not gas friendly. There are some that are.
So how you patched it will determine what I would suggest.
Some epoxies are not gas friendly. There are some that are.
So how you patched it will determine what I would suggest.
Briano
Yes as matter of fact, I have the Luck o'the Irish...everything I touch turns to fertilizer of the bovine variety.
You can lead a user to a link, but you can't make him Click....
Yes as matter of fact, I have the Luck o'the Irish...everything I touch turns to fertilizer of the bovine variety.
You can lead a user to a link, but you can't make him Click....
-
Hoppy
- Posts: 65
- Joined: Mon Apr 07, 2008 9:40 am
- What year is your cabby?: 1986
- Do you own a Cabriolet?: Yes
- Location: Kansas
Re: Sending unit float fail
I'm not sure the shop did it, I think they plastic weld it.
John
1950 Beetle
1955 Beetle
1982 Westy
1986 Cabriolet (Best Seller)
1950 Beetle
1955 Beetle
1982 Westy
1986 Cabriolet (Best Seller)
-
Briano1234
- Whats that smell?
- Posts: 4105
- Joined: Mon Mar 21, 2005 5:45 am
- What year is your cabby?: 1992
- Do you own a Cabriolet?: No
- Location: Duluth, Ga
- Contact:
Re: Sending unit float fail
With Plastic and Gas, you have to get the plastic really clean and oil free, before a glue will bond correctly.Hoppy wrote:I'm not sure the shop did it, I think they plastic weld it.
From the JB-WELD page.
Q. What can I use as a surface cleaner before using J-B Weld?
A. We recommend using acetone or lacquer thinner. In the absence of these two, soap and water can be used. Just be sure that the surface is completely dry before applying J-B Weld. DO NOT use alcohol or any “cleaner” that will leave a petroleum residue.
Q. Is J-B Weld resistant to water and/or gasoline?
A. When fully cured, J-B Weld is completely resistant to water, gasoline, and about every other petroleum product or automotive chemical. For wet-surface or submerged water or gasoline repairs, try our SteelStik or WaterWeld.
Q. Is there anything that J-B Weld WON’T bond to?
A. J-B Weld will not adhere or bond well to:
Any flexible rubber surface
Leather
Vinyl
Canvas
Polypropylene plastic
Polyethylene plastic
I think the answer is that the plastic and the glue were incompatible or that the cures wasn't as good.
Also I just learned that jb-quick isn't as strong as regular DAMN....
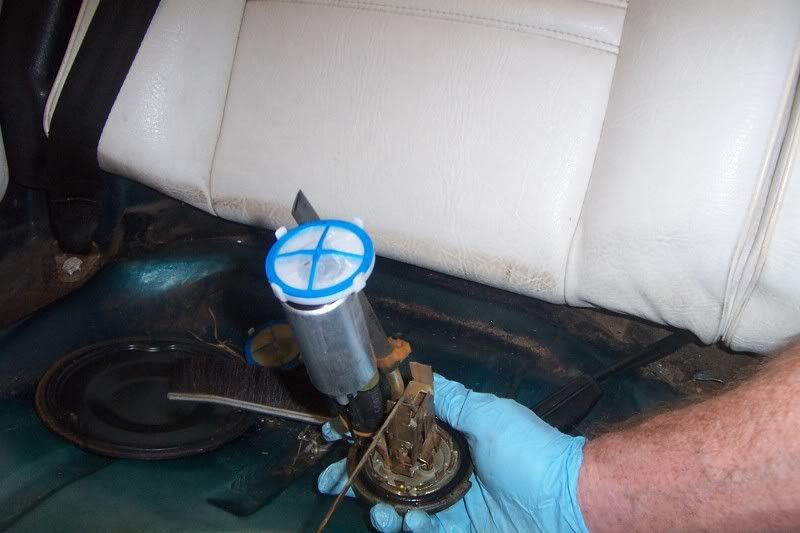
If it was me, I would try to clean the ball, and find the hole, then possibly drill it out, and use a plug (rubber) with some JB-Weld on the inside You can find those bayonet rubber plugs at hardware stores.
You can see it isn't much to it.
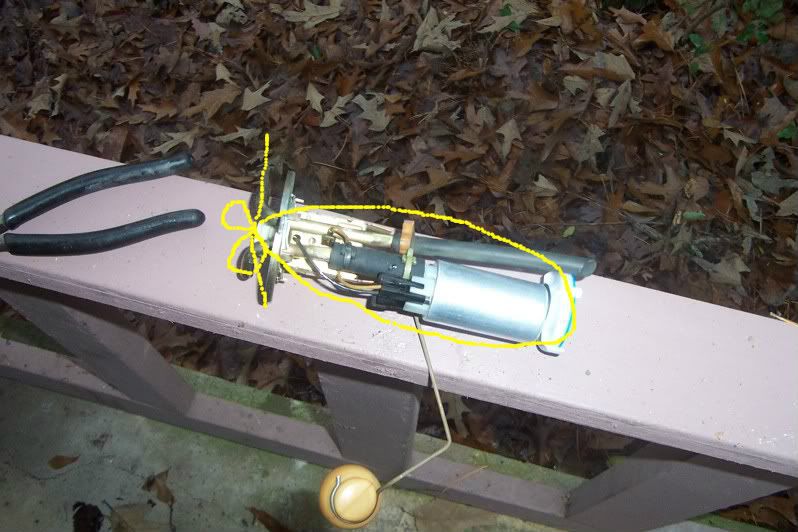
How to get to it?
###########################################################################
WARNINGS
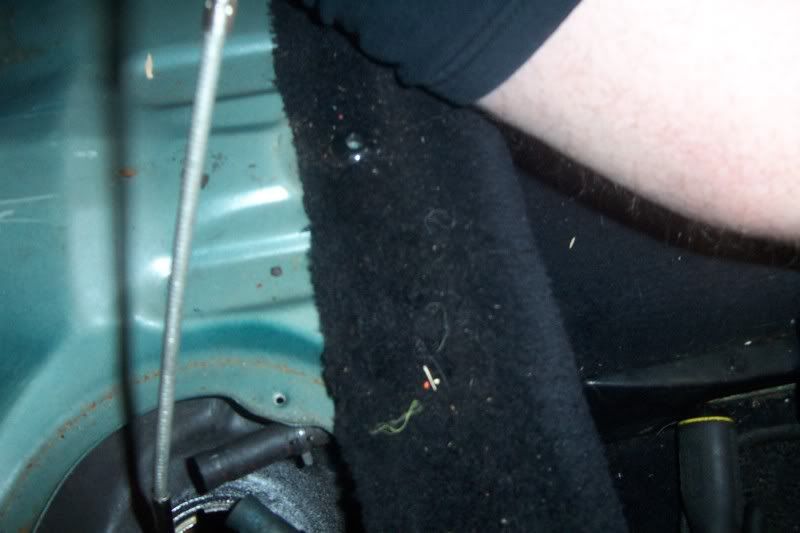
Do it in a well ventilated area Scoot the seat fully forward and have
all your tools ready.
OPEN YOUR TOP
###########################################################################
1. Make sure that you have 3/4 or less of a tank of gas
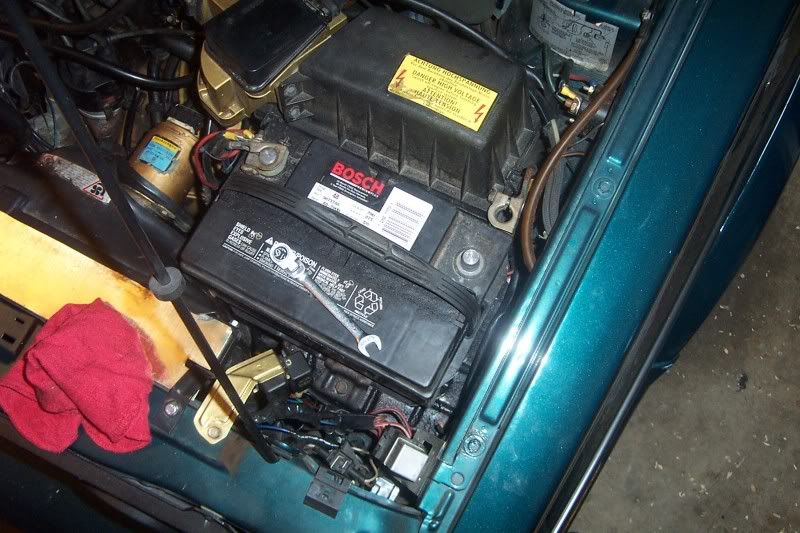
2. Disconnect the battery.
3. Open the gas cap to vent pressure.
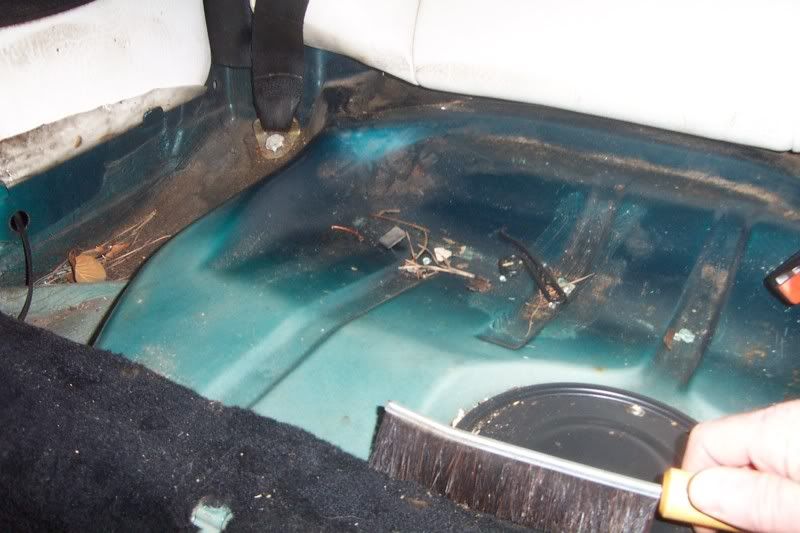
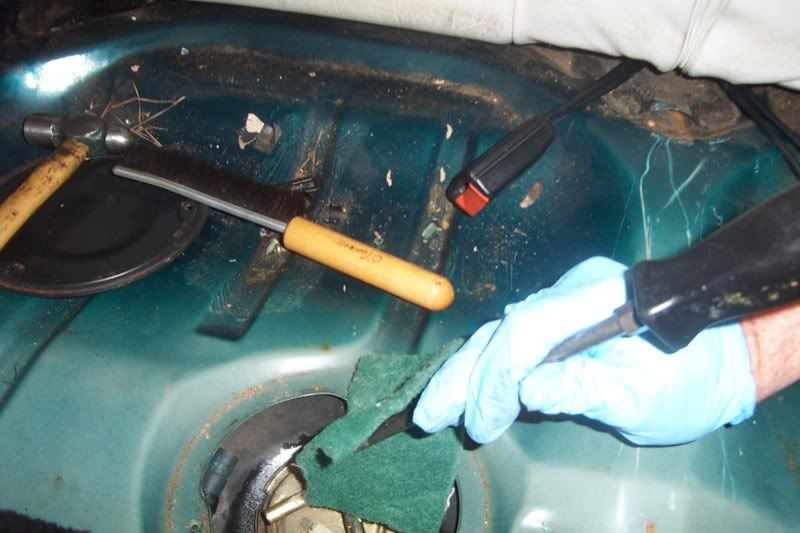
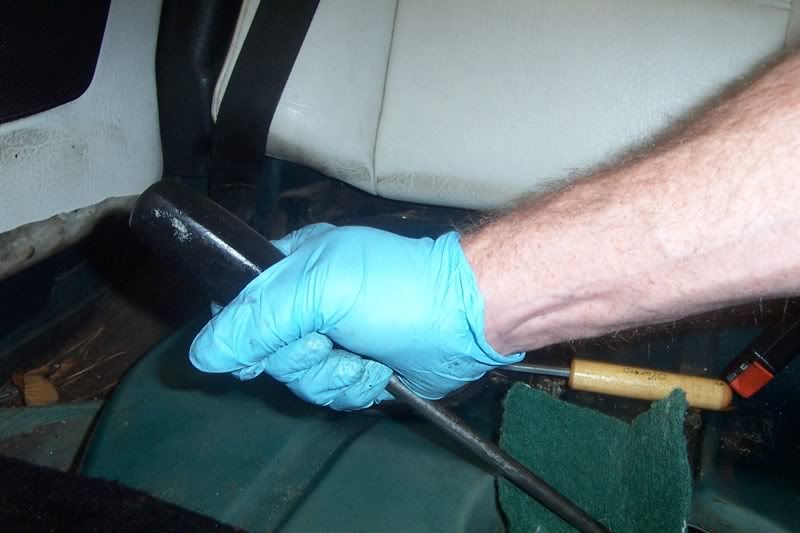
4. Remove the 2 phillips screws that are holding the rear seat bottom in place.
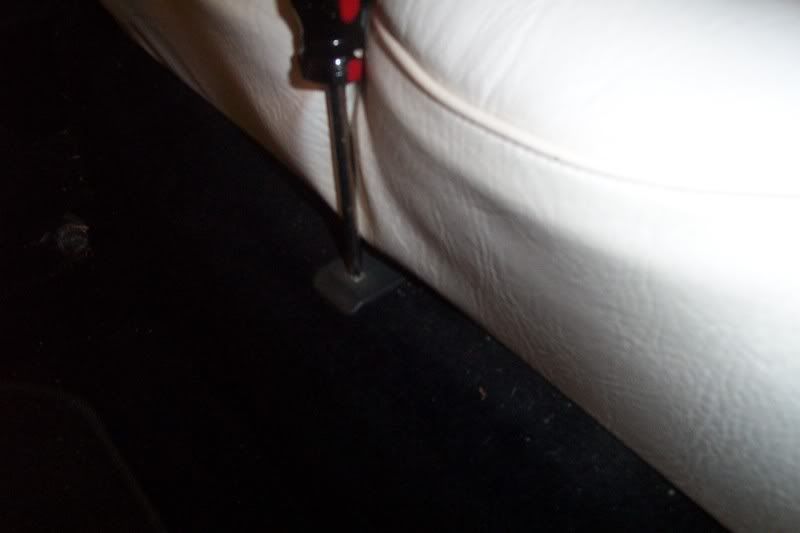
5. Remove the rear seat bottom
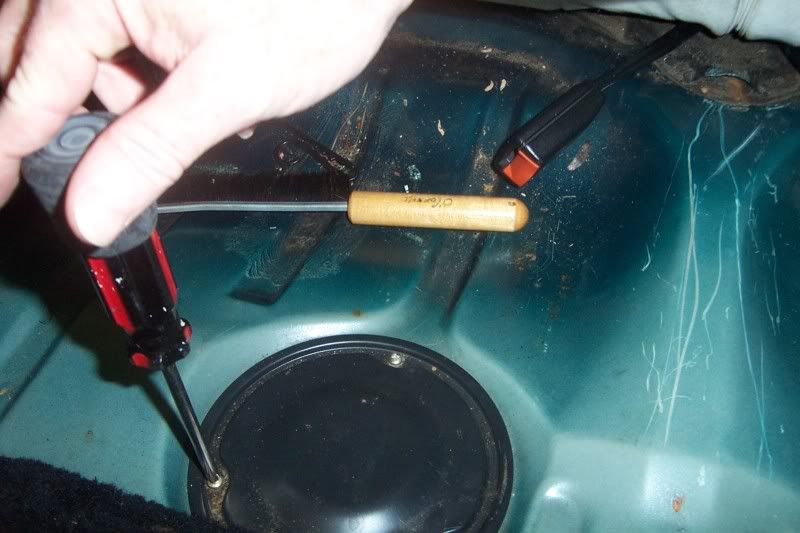
6. You will see a black circular cover held in place by 3 phillips screws.
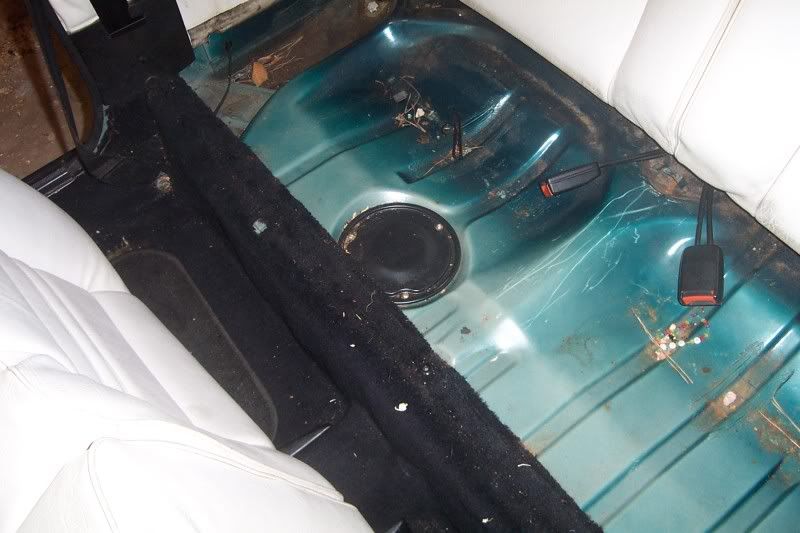
7. Clean the cap off of crud and dust the area around the cover, you don't want that falling in to your tank.
8. Remove the cover screws and pop the cap of with a flat blade and your hand.
9. You will see 2 hose connections and a electrical connector.
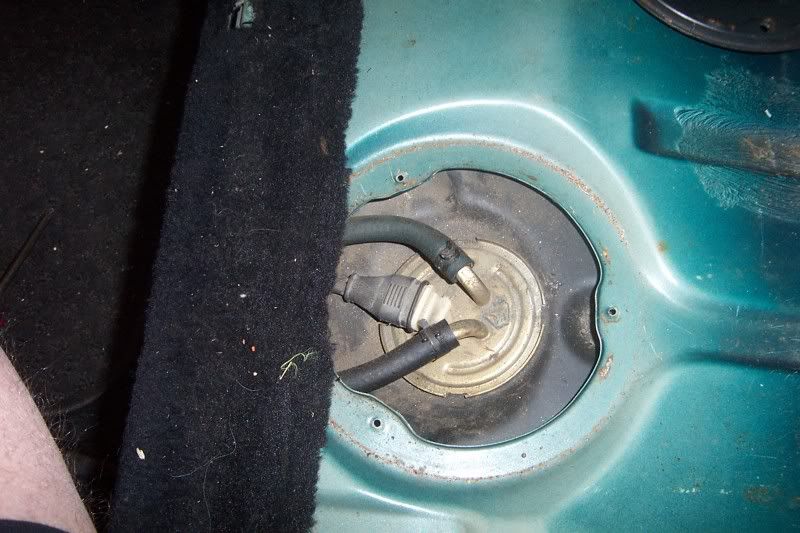
10. If the hose clamps are original they will need to be cut off with a pair or diagonal pliers then gently push the hoses off the tubes, they may spit a bit of gas.
11. Remove the electrical connector by wiggleing the rubber socket (do not pull on the wires).
12. Clean all the crud from around the fuel pump cap.
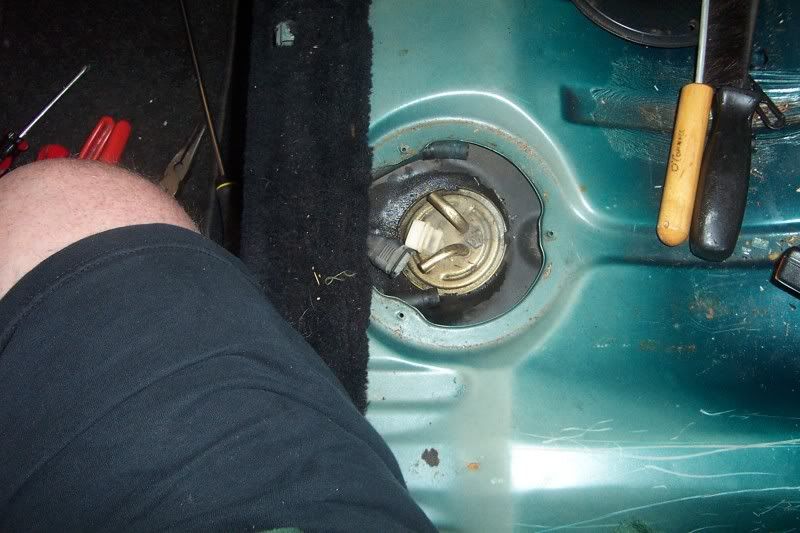
13. Take some duct tape and cover a large flatblade screwdriver tip.
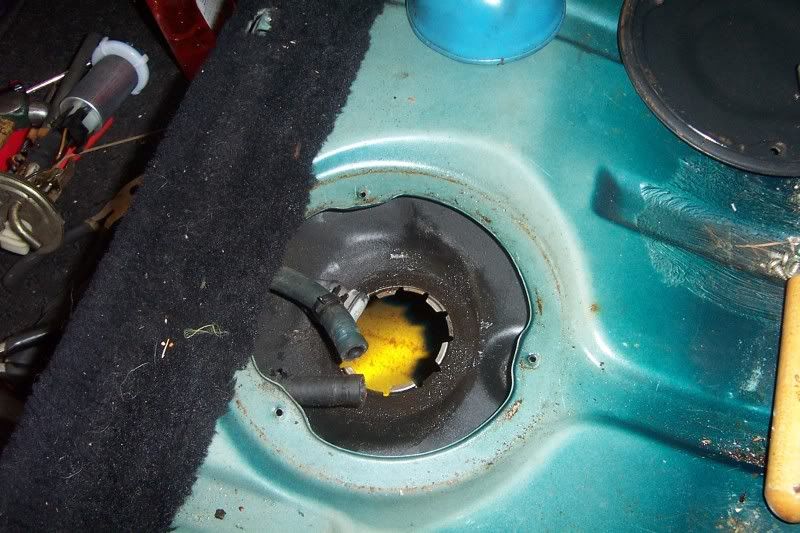
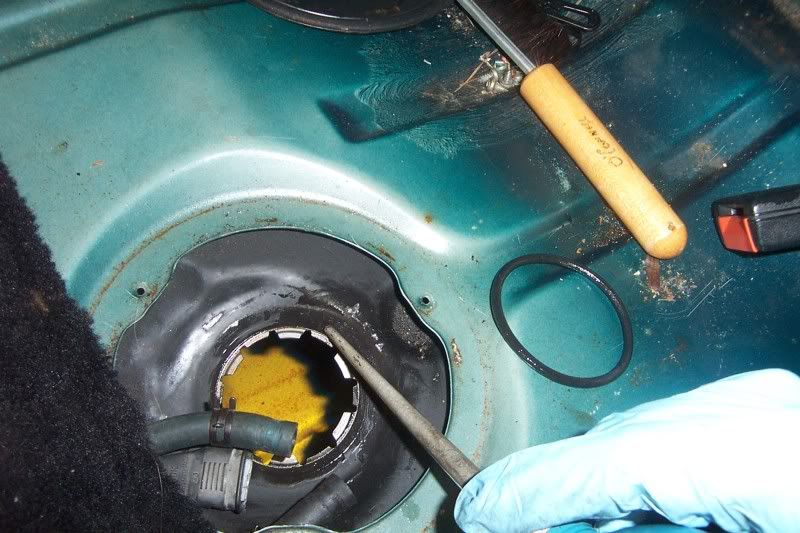
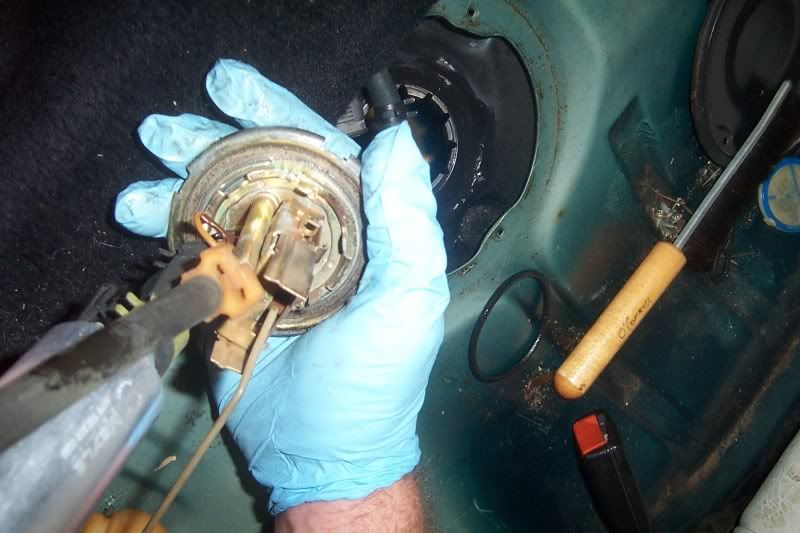
14. Use the flat blade to wedge in one of the notches on the rim of the fuel pump cover and smack it to the left (counter clock wise )untill the cap will pop off a bit. (you may have to smack all 3 tabs a bit to loosen.
15 Gently pull up and unwind the In-tank and float assembly out of the hole, you will have to wiggle it to clear the float arm and possible the sender unit do not be over forcefull, be carefull not to let the pickup screen fall back into the tank.
Be careful if you drop the strainer in the tank you can use a mechanical fingers to get it back out.
Going back
21. Tie a piece of string around the pump to hold the filter in place
22. Clean the o-ring gasket and the lip of the pump.
23. Lubricate the o-ring with petroleum jelly.
24. Wiggle the o-ring back to the top of the cap.
25. Gently replace the pump assembly in the tank be mindful to get the float in first and seat the o-ring (critical to get a good seat on the ring to the tank). Cut the string and pull out.
26. The pump will seat in to the locking tabs at the 5:o'clock position , then apply a little downward force clock wise to start the pump into the lock to catch.
27. Once the pump is caught on the locking tabs, then using the screwdriver and a hammer again smack the pump cap to the right (clock wise)
28. Once the pipes are facing the back seat as in the 6:30 position
29. Replace the hose and clamps.
30. Replace the electrical connector.
Briano
Yes as matter of fact, I have the Luck o'the Irish...everything I touch turns to fertilizer of the bovine variety.
You can lead a user to a link, but you can't make him Click....
Yes as matter of fact, I have the Luck o'the Irish...everything I touch turns to fertilizer of the bovine variety.
You can lead a user to a link, but you can't make him Click....
-
Hoppy
- Posts: 65
- Joined: Mon Apr 07, 2008 9:40 am
- What year is your cabby?: 1986
- Do you own a Cabriolet?: Yes
- Location: Kansas
Re: Sending unit float fail
I came across this sending unit and wonder if it is the same or would work?
http://www.rsjparts.com/catalog/product ... 3af7a8e3f1
http://www.rsjparts.com/catalog/product ... 3af7a8e3f1
John
1950 Beetle
1955 Beetle
1982 Westy
1986 Cabriolet (Best Seller)
1950 Beetle
1955 Beetle
1982 Westy
1986 Cabriolet (Best Seller)
-
Briano1234
- Whats that smell?
- Posts: 4105
- Joined: Mon Mar 21, 2005 5:45 am
- What year is your cabby?: 1992
- Do you own a Cabriolet?: No
- Location: Duluth, Ga
- Contact:
Re: Sending unit float fail
That looks as if it is for a rabbit diesel. It is 10 gallons, and doesn't have feed lines for the fuel pumps. That is really pricey for just the float.
I would suggest that you get to a wrecking yard.
I would suggest that you get to a wrecking yard.
Briano
Yes as matter of fact, I have the Luck o'the Irish...everything I touch turns to fertilizer of the bovine variety.
You can lead a user to a link, but you can't make him Click....
Yes as matter of fact, I have the Luck o'the Irish...everything I touch turns to fertilizer of the bovine variety.
You can lead a user to a link, but you can't make him Click....