Well I am replaceing the top, and had found some good news and some not so good news.
The good news is that I have found a one person way to remove the rear window.
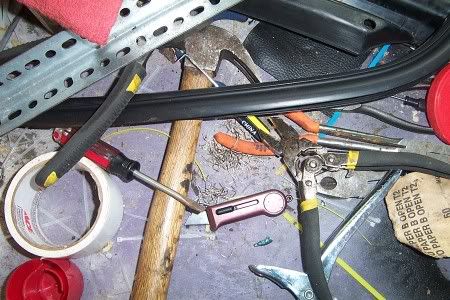
Remove the wires from the defroster be gentle.
Lift the outter rubber seal lip and force a thin blade screw driver down the side of the frame to the lip. Work it around the perimeter.
Then pull the lip and run a larger screwdriver to the lip, and spray the entire perimeter with PB-Blaster.......give it a minute or two to work.
Then you can easily work a Screwdriver under the lip and use it as a fulcrum to help work the gasket out..... I did the bottom first, then worked to the left and the top.... It basically popped right out.....with no problems.
The bad is that there is rust lots of it on the cable tray, I will get pics tomorrow. I have to figure out a repair for it.... and it may not be as bad as it first appears but it is in the middle of the cable tray.... and you know what my luck is like lately....
replacing the top
Moderators: kamzcab86, CalAltaDubber
-
Briano1234

- Whats that smell?
- Posts: 4105
- Joined: Mon Mar 21, 2005 5:45 am
- What year is your cabby?: 1992
- Do you own a Cabriolet?: No
- Location: Duluth, Ga
- Contact:
replacing the top
Briano
Yes as matter of fact, I have the Luck o'the Irish...everything I touch turns to fertilizer of the bovine variety.
You can lead a user to a link, but you can't make him Click....
Yes as matter of fact, I have the Luck o'the Irish...everything I touch turns to fertilizer of the bovine variety.
You can lead a user to a link, but you can't make him Click....
-
Briano1234
- Whats that smell?
- Posts: 4105
- Joined: Mon Mar 21, 2005 5:45 am
- What year is your cabby?: 1992
- Do you own a Cabriolet?: No
- Location: Duluth, Ga
- Contact:
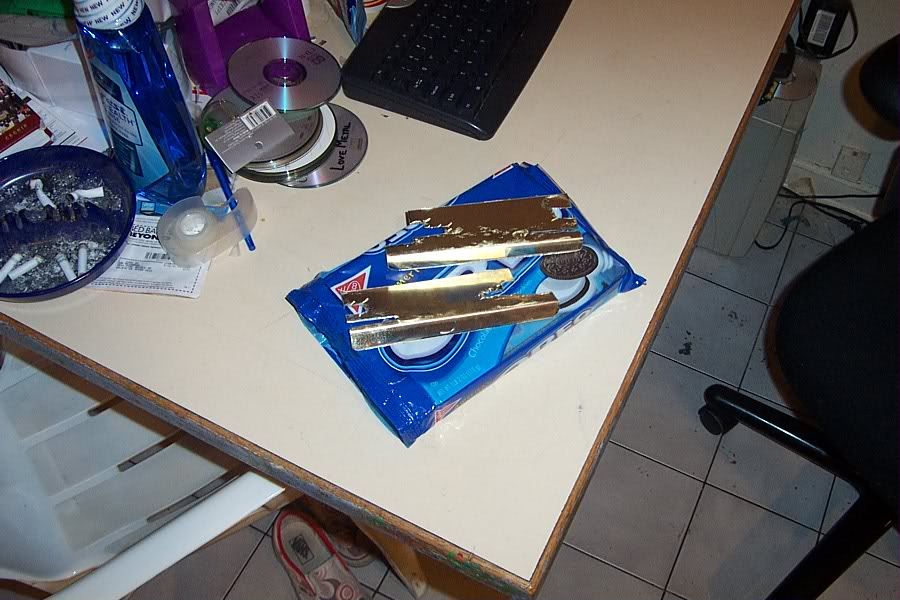
here are the 300bazzillion staples actually there were 136 of them in my top..I counted as I removed them
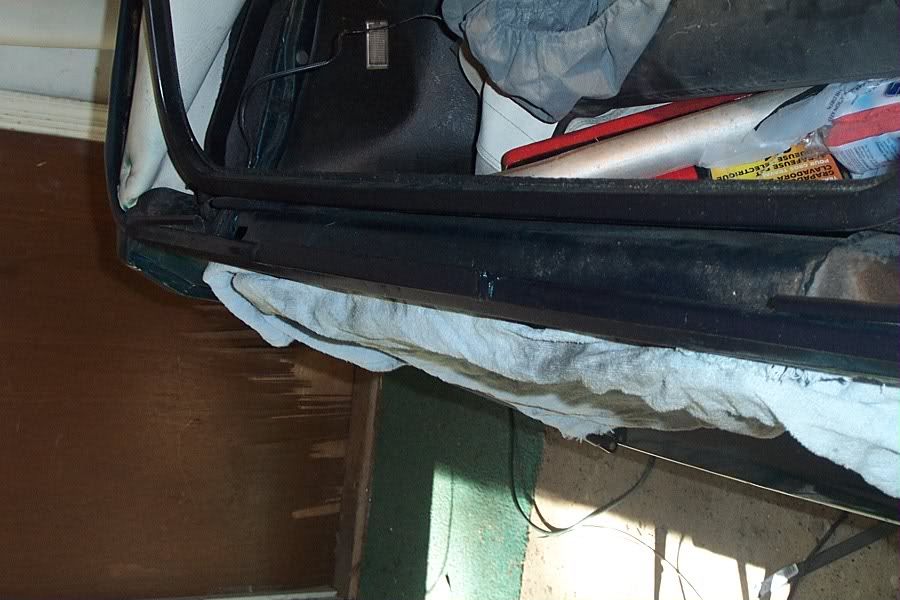
Here is the 10" of rusted cable tray.
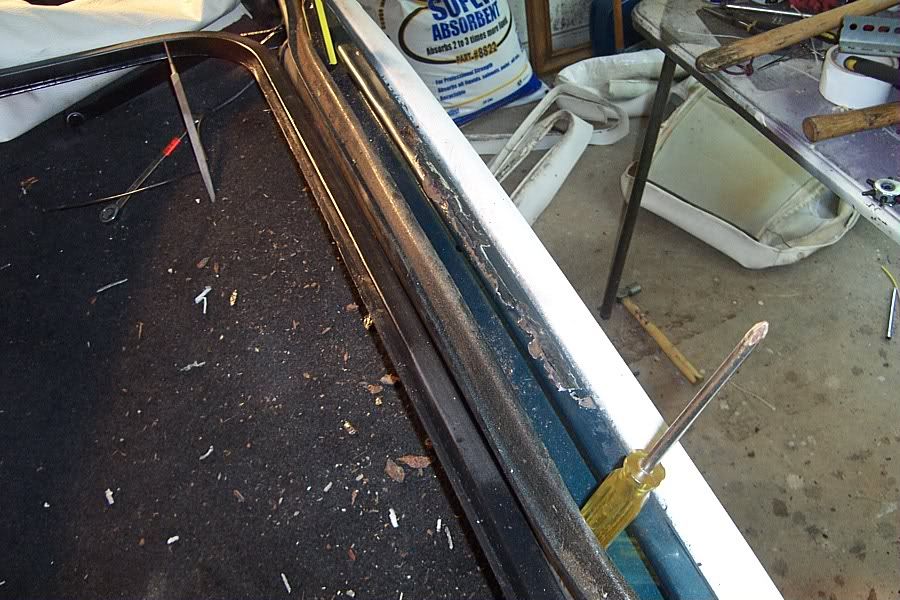
I have decided to cut it all out to good metal and weld a thin strip between the good and the bad to give the cable something to grab to.
Here is the 10" of rusted cable tray.
I have decided to cut it all out to good metal and weld a thin strip between the good and the bad to give the cable something to grab to.
Briano
Yes as matter of fact, I have the Luck o'the Irish...everything I touch turns to fertilizer of the bovine variety.
You can lead a user to a link, but you can't make him Click....
Yes as matter of fact, I have the Luck o'the Irish...everything I touch turns to fertilizer of the bovine variety.
You can lead a user to a link, but you can't make him Click....
-
Calimus

- Grand High PooBah
- Posts: 2892
- Joined: Mon Sep 02, 2002 11:40 pm
- What year is your cabby?: 1989
- Do you own a Cabriolet?: Yes
- Location: Cartersville, Ga
Brian, is there a way to check that area without having to pull the top?
If so I'd like to check the crabby cabby for this problem. I know we will be getting the top replaced in the next year, but I'd like to be able to prepare for something like that ahead of time if possible.
GL on the fix.
If so I'd like to check the crabby cabby for this problem. I know we will be getting the top replaced in the next year, but I'd like to be able to prepare for something like that ahead of time if possible.
GL on the fix.
16' Challenger ScatPack
05' Yamaha FJR1300
02' Honda VTX 1800C
05' Yamaha FJR1300
02' Honda VTX 1800C
-
Briano1234
- Whats that smell?
- Posts: 4105
- Joined: Mon Mar 21, 2005 5:45 am
- What year is your cabby?: 1992
- Do you own a Cabriolet?: No
- Location: Duluth, Ga
- Contact:
William,
Not that I know of, you have to loosen the cable and pull it out, then lift the top out of the cable tray.
I cut out the old and welded a 3/4 X 1/8 strip of steel Ground down to half the thickness on the edges to let the new steel have the same height as the cable try. I then ground down all the rust.
5 coats of derusto sealer.
Then I mixed up 5 minute JB weld and filled in all the low spots .
Sanded primed and painted.... look like typical bs repair but it isn't rusted no more, and the top will cover most of it...... with about 10 more coats of paint it may come out looking better than the rust.
Briano
Yes as matter of fact, I have the Luck o'the Irish...everything I touch turns to fertilizer of the bovine variety.
You can lead a user to a link, but you can't make him Click....
Yes as matter of fact, I have the Luck o'the Irish...everything I touch turns to fertilizer of the bovine variety.
You can lead a user to a link, but you can't make him Click....
-
Briano1234
- Whats that smell?
- Posts: 4105
- Joined: Mon Mar 21, 2005 5:45 am
- What year is your cabby?: 1992
- Do you own a Cabriolet?: No
- Location: Duluth, Ga
- Contact:
If I ever get the top back on and the exhaust on, tuned up then possibly next week.......Calimus wrote:You answer is pretty much what I expected, thanks though.
As for your progress, looking good. So when might I be able to see the green monster in person?
Briano
Yes as matter of fact, I have the Luck o'the Irish...everything I touch turns to fertilizer of the bovine variety.
You can lead a user to a link, but you can't make him Click....
Yes as matter of fact, I have the Luck o'the Irish...everything I touch turns to fertilizer of the bovine variety.
You can lead a user to a link, but you can't make him Click....
-
Briano1234
- Whats that smell?
- Posts: 4105
- Joined: Mon Mar 21, 2005 5:45 am
- What year is your cabby?: 1992
- Do you own a Cabriolet?: No
- Location: Duluth, Ga
- Contact:
William, I have the answer.... I thought that the cable in the back was broke as it was out in the middle. Well it was being pushed out because of rust, and the cable was intact untill I cut it to get it out of my way. I have a new one.
I have a time line.
Taking the old top off 2 hrs.
Cleaning the shit out of the rear Window gasket 1 hr.
Prepping the top ie: oiling all the hinge points and cleaning the rear window tray and painting it, cleaning all the old gooey closed cell foam.
3hrs killing all the rust, and spot painting.
So that is the timeline I have so far, the pad is good enough.
Tomorrow, replace the top.
It give all the paint time to harden.
Briano
Yes as matter of fact, I have the Luck o'the Irish...everything I touch turns to fertilizer of the bovine variety.
You can lead a user to a link, but you can't make him Click....
Yes as matter of fact, I have the Luck o'the Irish...everything I touch turns to fertilizer of the bovine variety.
You can lead a user to a link, but you can't make him Click....
-
Briano1234
- Whats that smell?
- Posts: 4105
- Joined: Mon Mar 21, 2005 5:45 am
- What year is your cabby?: 1992
- Do you own a Cabriolet?: No
- Location: Duluth, Ga
- Contact:
Got the top half on, had to stop due to my shoulder and arm giving me so much grief that I had to stop. So the car is in the garage with the top 3/4 installed I have to finish up cutting out the new rain gutters and replacing all the seals then the rear window, and caulking up for the proverbial rain entry points....
Then work interferes....
Then work interferes....
Briano
Yes as matter of fact, I have the Luck o'the Irish...everything I touch turns to fertilizer of the bovine variety.
You can lead a user to a link, but you can't make him Click....
Yes as matter of fact, I have the Luck o'the Irish...everything I touch turns to fertilizer of the bovine variety.
You can lead a user to a link, but you can't make him Click....


-
Briano1234
- Whats that smell?
- Posts: 4105
- Joined: Mon Mar 21, 2005 5:45 am
- What year is your cabby?: 1992
- Do you own a Cabriolet?: No
- Location: Duluth, Ga
- Contact:
Well even I can learn a lesson....
There had to be an easier way to seat the rear cable and I found it.
Fit the top to the front lip and square it to the frame.
Half raise the top frame and lock into position with a broom stick and a couple large Vice grips....
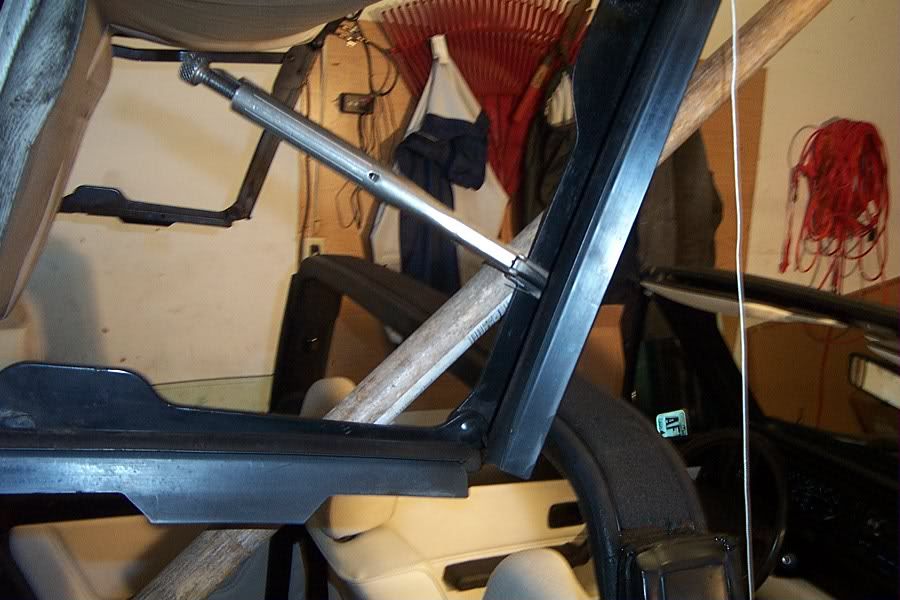
Drape the top and square it again.
For the rear top cable Here are a couple of tricks..
Mark the Center of the rear of the top between the 2 seams.
Mark the Center of the cable.
Mark the lip of your cable tray centered between the hinges.
Here's the trick.
Trim all the excess of the material off the back of the top, ie: where the lip is made so that you are only having 1 thickness of material rather than two doubled.
Slide the boot tabs over the cable.
Center the top the marks will get you in the ball park get it so that the seams are equal on the corners ie: bout a 1/4 of an inch from the edges of the trunk.
Now loosely fasten the cables on both ends one spin of the nut, so that you can feel some threads.
Don't worry about the corners yet.
Start the cable in with the clothespin hammer method, once the roll is tight to each other.
Watch here it comes
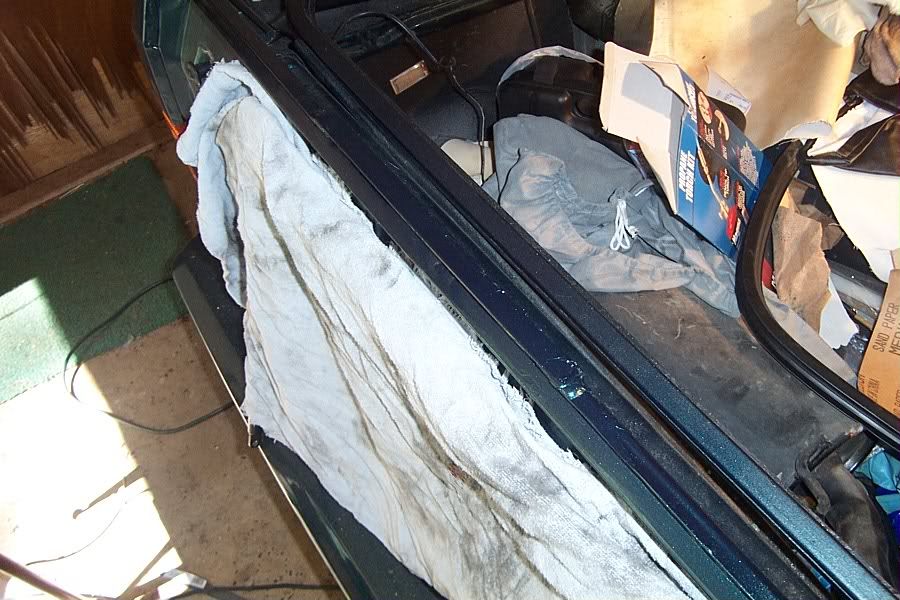
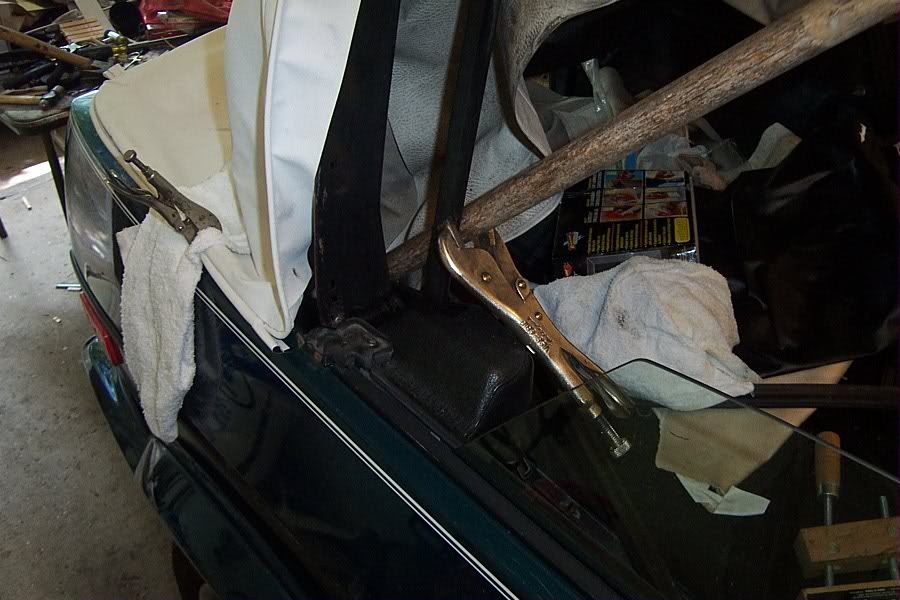
Take a pair of small 6 inch vice grips open them wide.... (those little jacking clamps with the rubber jaws would be better, but I don't have any sooo I improvised.
Take a terrycloth towel and Double it over....
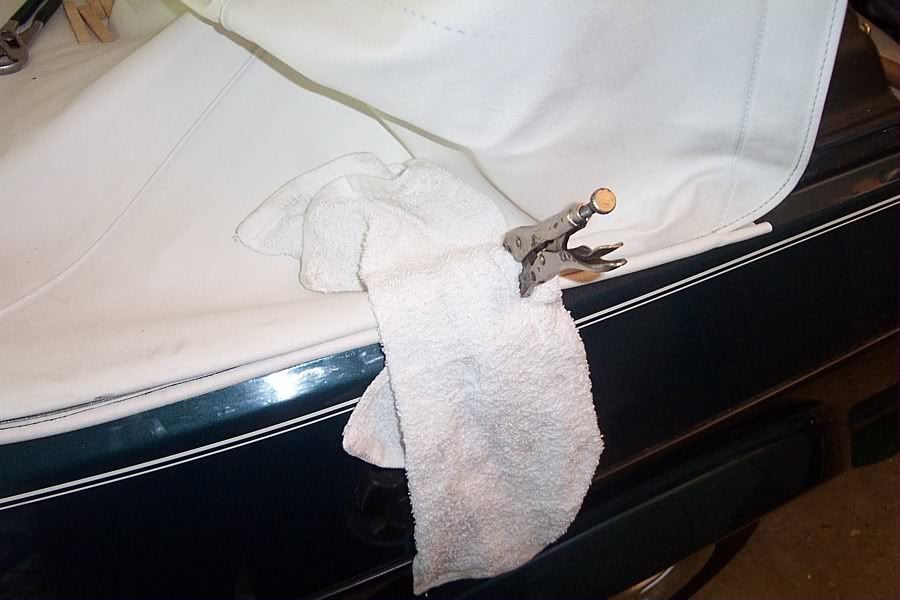
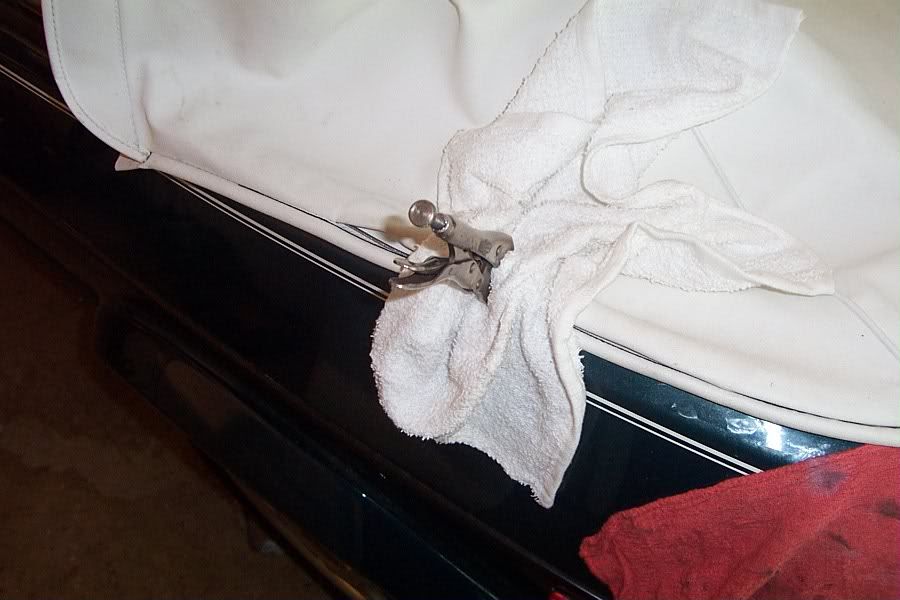
On one side of the center about 6 inches squeeze the cable and top in to the cable tray if you have those clamps that are spring loaded you probably won't even need the hammer and clothes pins.
Place the towel doubled over then clamp the vice grips over the towel and lock in to place over the top rear lip of the cable tray and the rolled edge of your top to assist your hands. You will be suprised at the ability to push the cable in with the vice grips or clamps alone... Ths trick is worth 50 bucks send all your pay pal donations to Briano.....
For the corners space out your boot tabs and I started the boot take by directly driving the boot tab cable and top into place with a round punch the lever action clamps would be so nice here.
The other side I forced the cable in the tray by using two clothes pins to lever it in place, I adjusted the corner and drove it home with the 1/2 inch round punch.
Now working one side you can move the vice grips to assist you in getting the side tight, and holding it there while you tighten the cable....
Hell I am even thinking about udoing the whole shooting match and go buying clamps to take pic's.... Naw what am I stupid or something the cable is in after only 1 hour of struggle.
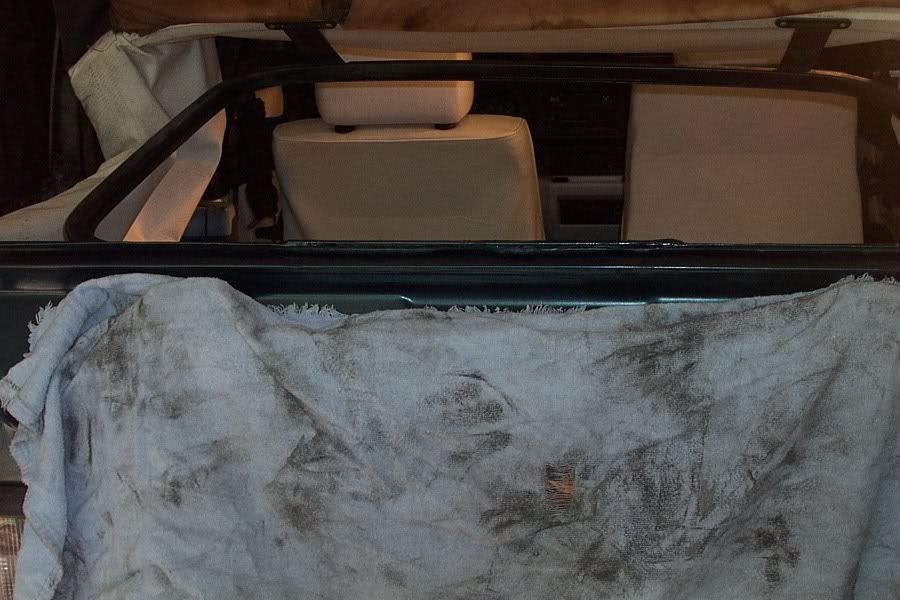
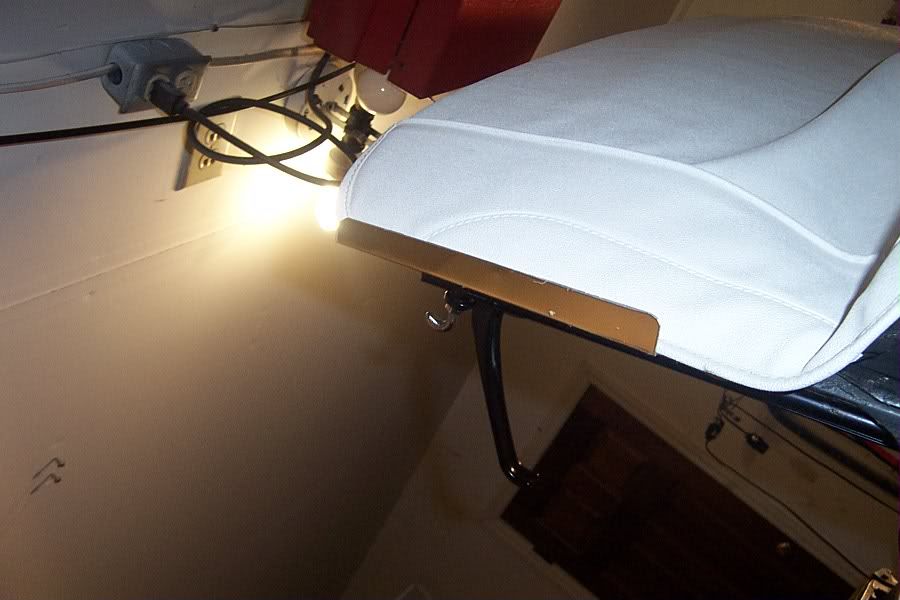
With the top in the half raised position there is enough slack to allow the top to drap over the cable tray to place the clamp on.
Side thought you can split a piece of radiator hose and place over both jaws of the vice grips.
Better tops through drugs and pain, and being by my self.
Then to finish it off with
Briano
There had to be an easier way to seat the rear cable and I found it.
Fit the top to the front lip and square it to the frame.
Half raise the top frame and lock into position with a broom stick and a couple large Vice grips....
Drape the top and square it again.
For the rear top cable Here are a couple of tricks..
Mark the Center of the rear of the top between the 2 seams.
Mark the Center of the cable.
Mark the lip of your cable tray centered between the hinges.
Here's the trick.
Trim all the excess of the material off the back of the top, ie: where the lip is made so that you are only having 1 thickness of material rather than two doubled.
Slide the boot tabs over the cable.
Center the top the marks will get you in the ball park get it so that the seams are equal on the corners ie: bout a 1/4 of an inch from the edges of the trunk.
Now loosely fasten the cables on both ends one spin of the nut, so that you can feel some threads.
Don't worry about the corners yet.
Start the cable in with the clothespin hammer method, once the roll is tight to each other.
Watch here it comes
Take a pair of small 6 inch vice grips open them wide.... (those little jacking clamps with the rubber jaws would be better, but I don't have any sooo I improvised.
Take a terrycloth towel and Double it over....
On one side of the center about 6 inches squeeze the cable and top in to the cable tray if you have those clamps that are spring loaded you probably won't even need the hammer and clothes pins.
Place the towel doubled over then clamp the vice grips over the towel and lock in to place over the top rear lip of the cable tray and the rolled edge of your top to assist your hands. You will be suprised at the ability to push the cable in with the vice grips or clamps alone... Ths trick is worth 50 bucks send all your pay pal donations to Briano.....
For the corners space out your boot tabs and I started the boot take by directly driving the boot tab cable and top into place with a round punch the lever action clamps would be so nice here.
The other side I forced the cable in the tray by using two clothes pins to lever it in place, I adjusted the corner and drove it home with the 1/2 inch round punch.
Now working one side you can move the vice grips to assist you in getting the side tight, and holding it there while you tighten the cable....
Hell I am even thinking about udoing the whole shooting match and go buying clamps to take pic's.... Naw what am I stupid or something the cable is in after only 1 hour of struggle.
With the top in the half raised position there is enough slack to allow the top to drap over the cable tray to place the clamp on.
Side thought you can split a piece of radiator hose and place over both jaws of the vice grips.
Better tops through drugs and pain, and being by my self.
Then to finish it off with
Briano
Briano
Yes as matter of fact, I have the Luck o'the Irish...everything I touch turns to fertilizer of the bovine variety.
You can lead a user to a link, but you can't make him Click....
Yes as matter of fact, I have the Luck o'the Irish...everything I touch turns to fertilizer of the bovine variety.
You can lead a user to a link, but you can't make him Click....
-
Briano1234
- Whats that smell?
- Posts: 4105
- Joined: Mon Mar 21, 2005 5:45 am
- What year is your cabby?: 1992
- Do you own a Cabriolet?: No
- Location: Duluth, Ga
- Contact:
The gutters are installed
The rear cable is giving me fits.. I don't like the way it is laying so I am redoing it.. only on the left side.
I really think that the replacement cables are not up to the VW standards. I believe it is thinner and more flimsy....
Having a dinked arm is a hinderance but I am getting there.
The rear cable is giving me fits.. I don't like the way it is laying so I am redoing it.. only on the left side.
I really think that the replacement cables are not up to the VW standards. I believe it is thinner and more flimsy....
Having a dinked arm is a hinderance but I am getting there.
Briano
Yes as matter of fact, I have the Luck o'the Irish...everything I touch turns to fertilizer of the bovine variety.
You can lead a user to a link, but you can't make him Click....
Yes as matter of fact, I have the Luck o'the Irish...everything I touch turns to fertilizer of the bovine variety.
You can lead a user to a link, but you can't make him Click....
-
Calimus
- Grand High PooBah
- Posts: 2892
- Joined: Mon Sep 02, 2002 11:40 pm
- What year is your cabby?: 1989
- Do you own a Cabriolet?: Yes
- Location: Cartersville, Ga
Looking real good Brian. However, if you still haven't gotten it finished by Friday night, let me know. Cristine will be out of town this weekend so I could easily make the haul out to your place on Saturday and lend you an extra hand or two.
16' Challenger ScatPack
05' Yamaha FJR1300
02' Honda VTX 1800C
05' Yamaha FJR1300
02' Honda VTX 1800C